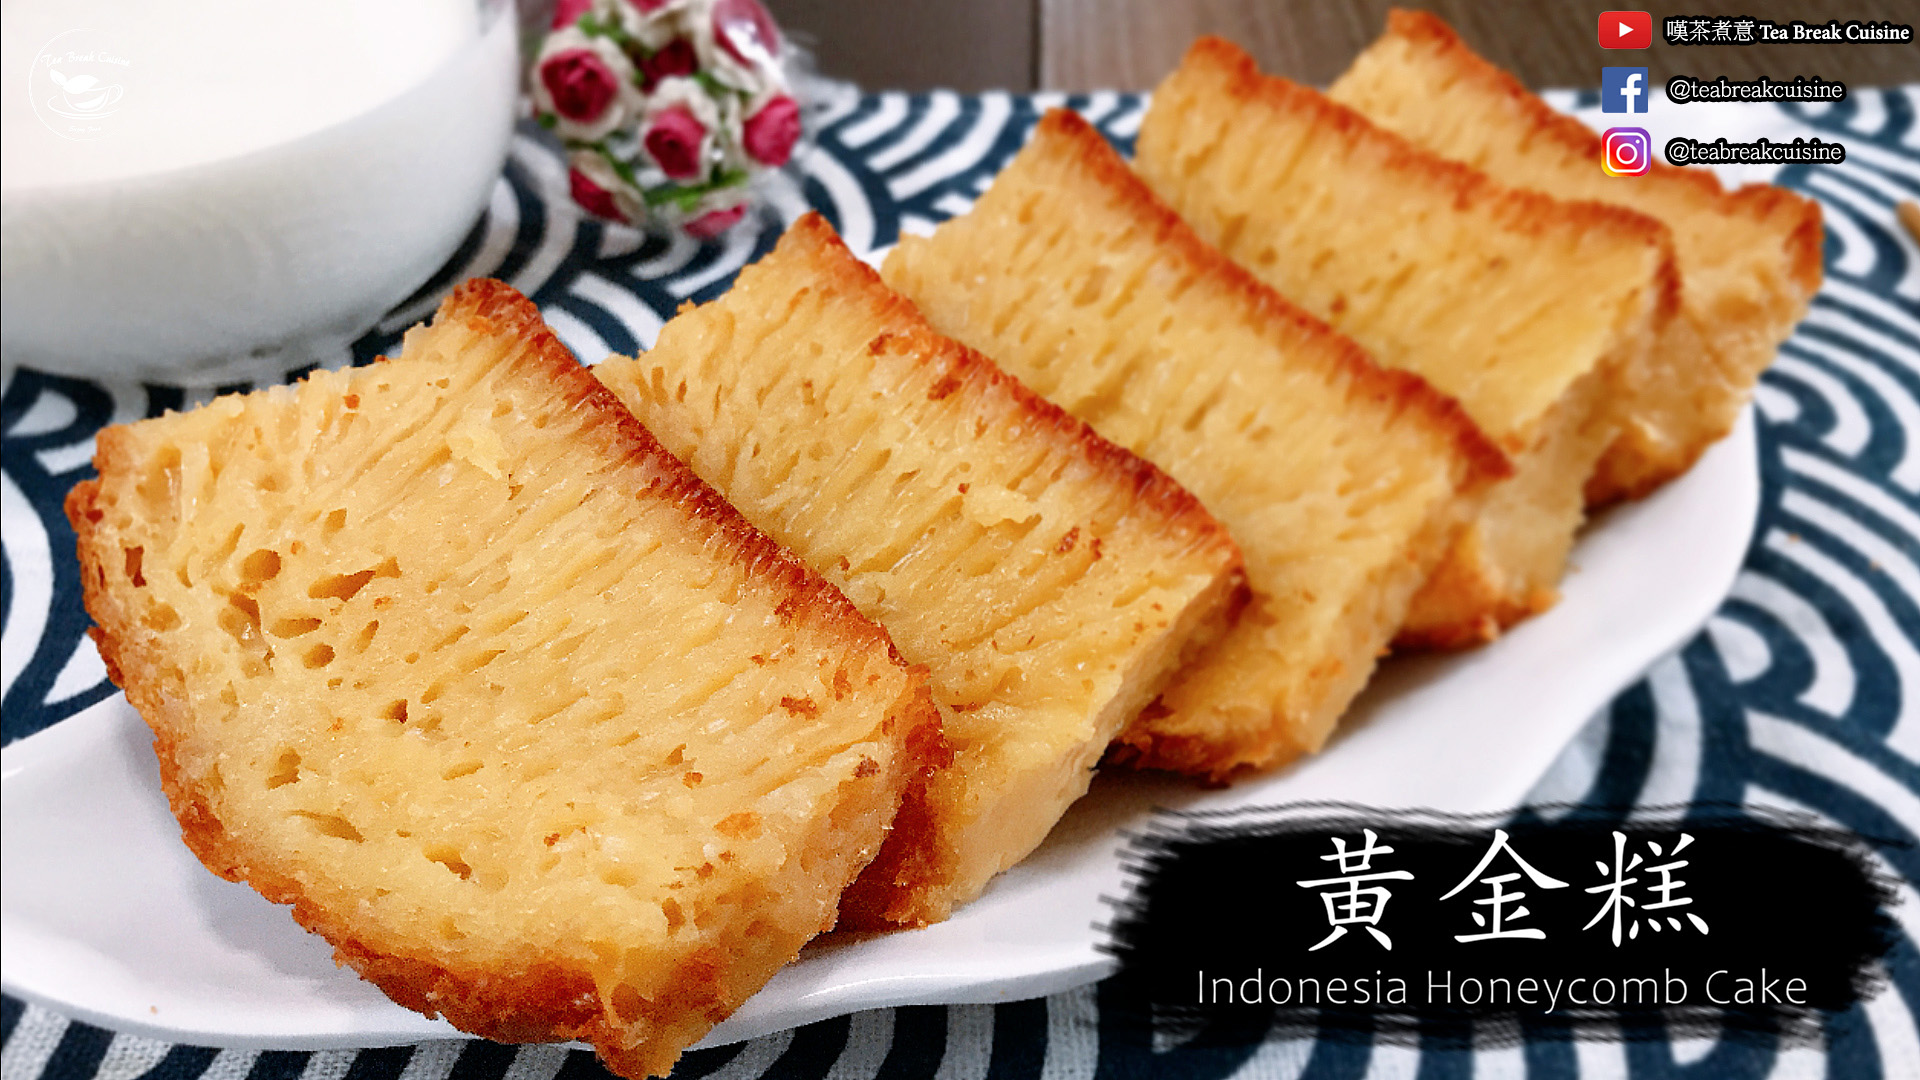
黃金糕是來自於印尼的傳統甜品,在廣東稱為糕王,也是近年香港新興的賀年糕點之一。它的製作時間雖然比較長,工序亦比較多,但是掌握到發酵的技考就很易成功,而這個簡易食譜的成果亦不比外面的遜色。它味道清甜椰香十足,口感彈牙煙韌,切開是均勻的蜂窩坑紋,就像魚翅般的絲狀。趁著新年佳節,大家一起試試這款賀年糕點吧。現在一起試試做吧!以下是我媽媽整的食譜。

唔知大家有無吃過黃金糕呢🥮?它又名魚翅糕,因為它切開有大量一條條長形的坑紋,像魚翅一樣。而我都是近年才認識這個糕點,多數都是在過農曆新年時🧨,親戚送禮才能吃到,發現完來是價格不菲的,所以就特別珍惜能夠吃到的機會。不過後來我和媽媽逛街時發現原來一些印尼店舖也有售買,而且價錢比較便宜!
在過年時,不停看到有關黃金糕的廣告,一件件金黃色精緻的糕點令我流晒口水🤤,當然立刻撒嬌叫媽媽研究這食譜,一問之下原來媽媽年輕時也有做過這甜品(不愧是我的媽媽,究竟有甚麼不懂整😯),所以她很快就答應我。這糕點口感煙韌彈牙,最適合喜歡煙煙韌韌的東西的朋友👭,味道充滿香濃的椰子香🥥和蛋黃香🥚,不論是蒸或煎都很香口好食,令人吃到不停口!
另外整這個糕點時,最重要是發酵的過程,需要特別注意溫度🌡️和時間⏱️,因為需要經過一段很長的時間發酵,否則切開就看不見一個個洞的蜂窩坑紋,變成一磚硬實實的糕點,不過其實我覺得味道都不差😳(稍稍話)。

黃金糕食譜 Recipe
材料 Ingredients:
- 雞蛋 5隻 / 5 Eggs
- 木薯粉 180克 / 180g Tapioca Flour
- 澄麵粉 10克 / 10g Wheat Starch
- 吉士粉 10克 / 10g Custard Powder
- 砂糖 80克 / 80g Custer Sugar
- 椰漿 190克 / 190g Coconut Milk
- 牛油 25克 / 25g Butter
- 酵母粉 4克 / 4g Instant Yeast
- 鹽 少許 / A little Salt
做法 Step:
- 把椰漿倒入鍋中,加入牛油,用小火烹煮至牛油溶化,然後加入小許鹽拌勻。
- 把木薯粉、澄麵粉和吉士粉倒入碗中,然後把椰漿待涼後倒入並伴勻至沒有粉粒。
- 把酵母粉加入粉漿中並拌勻,然後過篩備用。
- 把雞蛋加入到大碗中,然後一邊用攪拌器高速打發,一邊把砂糖分3次加入到蛋漿,把蛋漿打發至濃稠。(花紋沒有消失的狀態)
- 把蛋漿加入至木薯粉漿中拌勻,然後把它放入40°C的焗爐發酵1.5小時,每間30分鐘攪拌麵糊一次,共3次。
- 把焗模鋪上牛油紙,然後把麵糊倒進模中,然後再放入焗爐發酵1小時。
- 用下火200°C焗20分鍾,然後下火轉150°C上火180°C焗15分鐘,再把鋪錫紙鋪面,防止烤焦,以上下火150°C焗20分鐘。出爐後把黃金糕放在架上待涼並切件。
貼是: 可視乎焗爐把剛開始烤焗下火的溫度調高 使糕點上半部的坑紋更明顯
- Add coconut milk and butter to pot, simmer until the butter melts, then add a little salt.
- Pour tapioca flour, wheat starch and custard flour into a bowl, then pour the cooked coconut milk into it and mix until there are no powder particles.
- Add instant yeast to the mixture, and mix lightly, then sift it for later use.
- Beat eggs to a large bowl, then whip the eggs with electric mixer at high speed while add sugar to the egg mixture in 3 interval. Whip until there is thick and creamy consistency. (There is stripe texture in the egg mixture and does not disappear)
- Put the egg mixture to the coconut mixture and mix well, then put it in an oven at 40°C to ferment for 1.5 hours. Stir the batter every 30 minutes, 3 times totally.
- Cover the cake mold with baking paper, and pour the batter into it, then put it in the 40°C oven to ferment for 1 hour.
- Bake at 200°C for bottom heat only for 20 minutes, then turn to 180°C for upper heat and 150°C for bottom for 15 minutes, then turn to 150°C for both for 20 minutes. You can cover aluminum foil when the cake start burned. After baking, put the Honeycomb Cake on trivet to cool down and cut into pieces.
Tips: You can increase temperature of bottom heat at the beginning baking process to increase the upper honeycomb pattern.